Pork Chile Verde

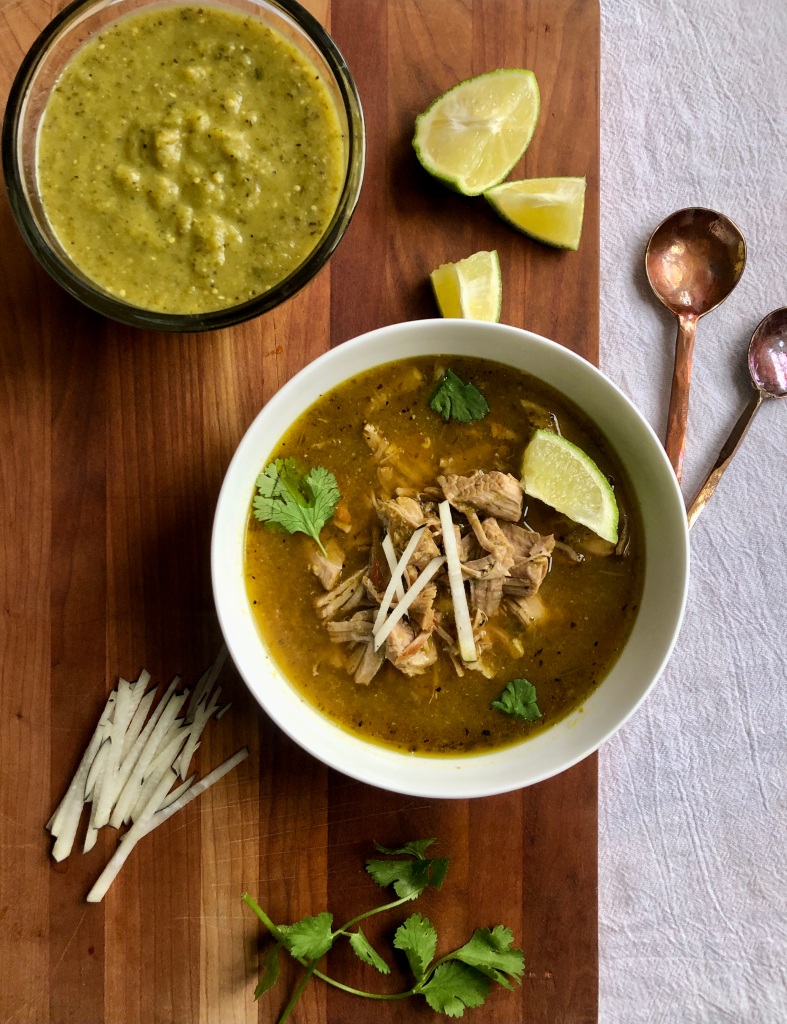
Pork Chile Verde is an easy and delicious way to infuse some flavor into your weekly meals. Made in either the Instant Pot or slow-braised in the oven or slow-cooker, this pork is delicious served in tacos, over nachos, alongside veggies or a crunchy salad, or as is. My own personal favorite way to eat this pork chile verde is to stir in some fresh or frozen corn, canned beans, diced zucchini, and some greens like spinach or kale for a flavorful pork stew topped with radishes and whatever cheese I’ve got on hand. It’s SO good and perfect for a cold winter meal. Read on for the recipe as well as three different methods to cook this chile verde (Instant Pot, slow-cooker, or oven)!

Ingredients needed to make Pork Chile Verde

To start this recipe, you can choose between making your own salsa verde or using a store-bought ones. Both options are great, but I will say that the homemade salsa verde is next-level. Using just a few fresh ingredients, your broiler, and a blender, you can have homemade salsa verde in under 15 minutes. It’s AMAZING. Here’s everything you’ll need:

For the salsa verde:

  • Fresh tomatillos
  • Poblano peppers
  • Jalapeno peppers
  • Yellow or white onion
  • Garlic
  • Cilantro

For the pork:

Tools used to make Pork Chile Verde

Depending on which method you choose to make this chile verde, and whether you choose to make your own salsa, the tools required to execute this dish will vary. Luckily, there isn’t anything out of the ordinary required! I’ll list the tools needed if you make the recipe exactly as written, including the homemade salsa verde. Here’s the list:

For the salsa verde:

  • Rimmed sheet tray
  • High-speed blender

For the pork:

  • Sharp chef’s knife
  • Instant pot, slow cooker, or large Dutch oven with a lid
  • Tongs
  • Two forks, for shredding meat

How to make Pork Chile Verde

This recipe looks and sounds a bit more complicated than it looks. You’ll begin by preparing your vegetables to roast under the broiler. Remove the husks from your tomatillos, halve and seed the peppers, remove the skin and quarter the onion, and peel the garlic cloves and add to a sheet tray. Drizzle all over with avocado oil, then place on the top rack directly under the broiler. Let them roast approximately 10-12 minutes until the skins are charred and the vegetables have begun to release their juices and soften. Add everything to a high-speed blender with a pinch of salt and pureé until smooth.

Once you’ve made your salsa, you’ll want to prepare the pork for searing. Cut it into roughly 2-inch pieces and heat some avocado oil in your cooking vessel of choice. My preferred method is the Instant Pot for time’s sake, but using a slow cooker or Dutch oven works great as well. Be sure to see the full slow cooker instructions in the recipe below, as you’ll need to sear the meat in a different pot before adding to the slow cooker.

Sear the meat in the hot oil, working in batches to avoid crowding the pan. Once all the meat is seared, add it back to the pot and cover with the salsa verde and chicken broth. Stir in the cumin, oregano, and a pinch each of salt and pepper, and let it cook!

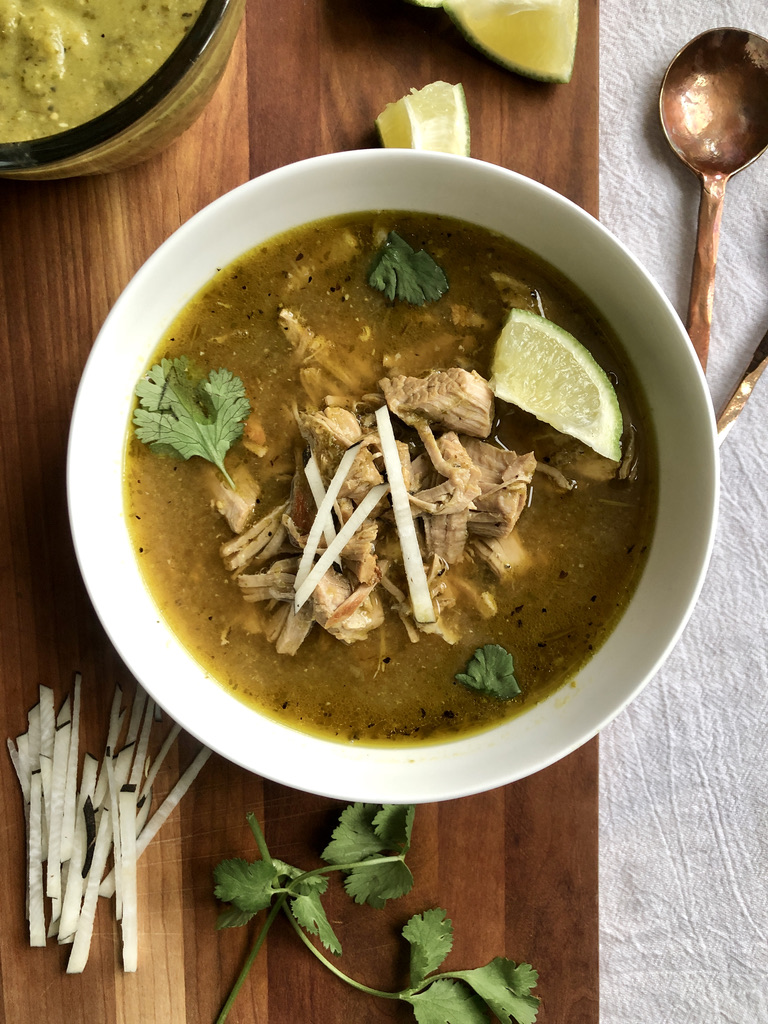
You’ll know the meat is finished when it is falling apart and easily shreds using two forks. Serve this pork inside tacos or over nachos, with added veggies for a quick stew, or scooped onto a fork and devoured as is.

Looking for other easy and flavorful protein options?

Try these recipes from The Ardent Cook!

Harissa Chicken Thighs

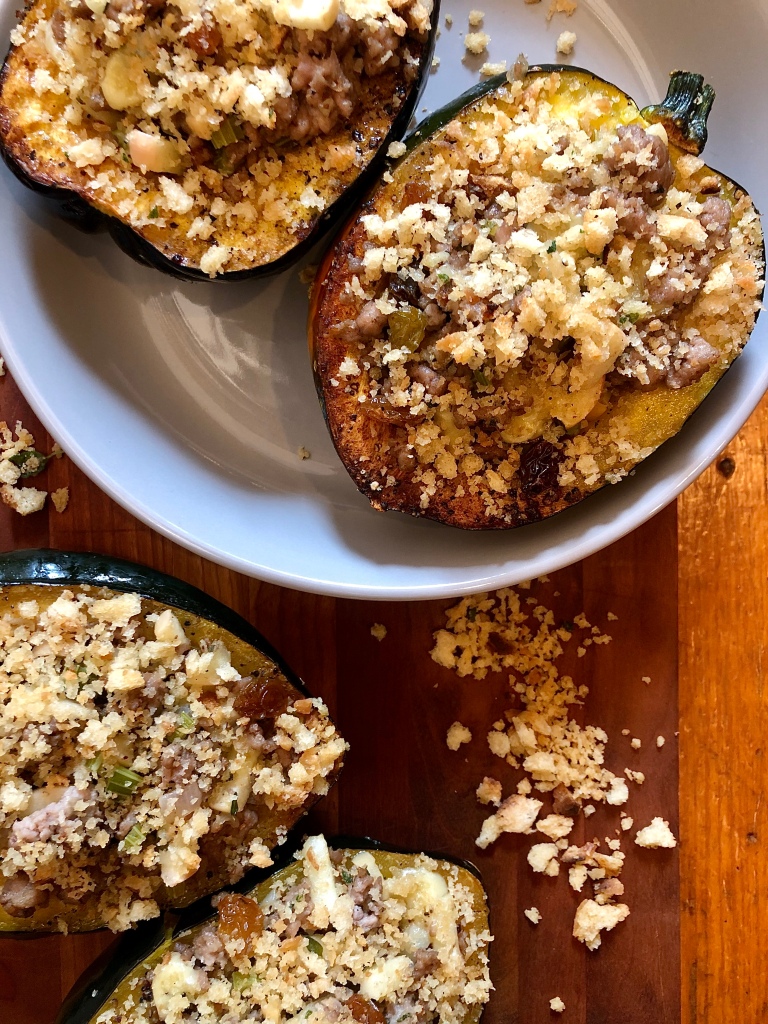
Gorgonzola-Stuffed Chicken with Delicata Squash

Mediterranean Grilled Strip Steak

Recipe Ingredients

1 pound fresh tomatillos, husks removed, quartered

2 large poblano peppers, halved and seeded

2 jalapeño peppers, halved and seeded

1 yellow onion, skinned and cut into 6 wedges

4 cloves garlic, skinned

1 cup cilantro leaves and stems, packed

2.5-3 pounds pork tenderloin, trimmed and cut into 2-inch pieces

2 Tbsp avocado oil

2 cups chicken broth

1 tsp ground cumin

1 Tbsp dried oregano

Juice of 1 lime

Salt and pepper, to taste

Fresh radishes, thinly sliced (optional, for serving)

Additional cilantro, for serving

Recipe Instructions

For the salsa verde

  1. Prepare vegetables as directed and add to a large rimmed sheet tray. Drizzle with avocado oil and broil on high on the top rack of the oven for 10-12 minutes, or until skins are black and blistered and vegetables are beginning to soften and release their juices.
  2. Add to a high-speed blender with a pinch of salt and blend until smooth. Adjust seasonings as needed to taste. Set aside. Alternatively, one 16oz jar of store-bought salsa verde may be substituted.

Instant Pot Method (preferred)

  1. Prepare pork as directed and season all over with salt. Turn the Instant Pot to the sauté function and heat avocado oil. Working in batches, sear the pork on all sides.
  2. Add all of the seared pork back into the IP and top with the salsa verde, chicken broth, cumin, oregano, and a pinch each of salt and pepper. Stir to combine. Close the lid and place vent to “sealing” position, then cook on manual high pressure for 35 minutes. Allow for 10-15 minutes of natural pressure release, then quick release the remaining steam before opening the lid.
  3. Shred the pork using two forks. Stir in the fresh lime juice and taste the chile verde for salt and pepper, then add to taste. Top with thinly sliced radishes and cilantro, or add to tacos, nachos, a stew, or enjoy with eggs in the morning.

Slow-Cooker Method

  1. Prepare pork as directed and season all over with salt. Heat avocado oil in a large skillet over medium-high heat and sear the pork on all sides, working in batches as necessary to avoid crowding the pan.
  2. Transfer the seared pork to the slow-cooker and top with the salsa verde, chicken broth, cumin, oregano, and a pinch each of salt and pepper. Stir to combine. Cook on low for 5-6 hours, or on high for 2.5-4 hours. The meat is finished when it is falling apart and easily shreds using two forks.
  3. Shred the meat, then stir in the fresh lime juice and season with salt and pepper to taste. Top with thinly sliced radishes and cilantro, or add to tacos, nachos, a stew, or enjoy with eggs in the morning.

Oven Method

  1. Preheat the oven to 350 degrees Fahrenheit. Prepare pork as directed and season all over with salt. Heat avocado oil in a Dutch oven over medium-high heat and sear the pork on all sides, working in batches as necessary to avoid crowding the pan.
  2. Add all of the seared pork to the Dutch oven and top with the salsa verde, chicken broth, cumin, oregano, and a pinch each of salt and pepper. Stir to combine. Cover and bake for 1.5-2.5 hours, checking periodically, until the pork is falling apart and easily shreds using two forks.
  3. Shred the meat, then stir in the fresh lime juice and season with salt and pepper to taste. Top with thinly sliced radishes and cilantro, or add to tacos, nachos, a stew, or enjoy with eggs in the morning.

There may be affiliate links in this post! By purchasing a product I recommend, I may receive a small compensation. However, I only recommend products I love and use myself. Thank you for your continued support of The Ardent Cook, it does not go unnoticed.

Creamy Sausage and Kale Rigatoni

The holidays always bring about strong feelings of comfort food, and this Creamy Sausage and Kale Rigatoni fills the void so incredibly well. If gluten and dairy aren’t for you, I’ve tested this recipe using a grain-free pasta alternative as well as dairy-free milk and cheese. Luckily, there are loads of swaps you can make to create the dish that works for you based upon your dietary needs, or just use the real stuff. I love this as an easy weeknight dinner or as a solution to your Christmas Eve dinner needs for gatherings large and small. I hope you enjoy it!

Ingredients needed to make Creamy Sausage and Kale Rigatoni

This dish uses all the traditional Italian pasta ingredients like rigatoni, ground sausage, herbs, and cheese. Here’s a full list of everything you’ll need, plus links to some swaps I used to make this compliant with my current gluten- and dairy-free eating habits:

  • Rigatoni or other cylindrical pasta shape (I like this brand if GF)
  • Ground Sweet Italian sausage
  • Olive oil
  • Kale
  • Fresh garlic
  • Crushed red pepper flake
  • Heavy cream (substitute non-dairy milk or cream alternative if DF)
  • Pasta cooking water
  • Mozzarella (substitute non-dairy cheese or goat cheese, if tolerated)
  • Lemon zest
  • Salt
  • Freshly ground black pepper

Tools used to make Creamy Sausage and Kale Rigatoni

I love pasta dishes because they take close to no equipment to pull off. This dish comes together with only a few tools, most of which you likely already have. Here’s the complete list:

How to make Creamy Sausage and Kale Rigatoni

This pasta recipe is very straightforward, making it a welcome addition to any weekly meal plan. It’s also the perfect recipe to throw together the night before a big holiday, such as, ahem, Christmas Eve… particularly if you haven’t finished wrapping gifts for the big day.

You’ll start by cooking your pasta in the pasta pot according to package directions. Be sure to reserve approximately 1/2 cup of the pasta cooking liquid before draining, as this helps us achieve a silky creamy sauce that adheres to each noodle.

While the pasta cooks, brown your sausage in a large skillet or deep pot. I prefer to use my Dutch oven for this step. Once browned, push the sausage into a ring at the outside of the pan to make space in the middle for the garlic. Add the olive oil, garlic, and crushed red pepper flakes, stirring it around until fragrant, then stir to combine with the sausage. Add the kale and stir again, allowing it to wilt slightly.

Once the pasta is drained, add it directly into the pot with the sausage and kale while still hot. Add the heavy cream, pasta cooking water, and cheese, folding everything together. If needed, you may turn the burner on low to encourage melting of the cheese and thickening of the sauce.

Once the pasta is creamy and all ingredients are incorporated, fold in the freshly grated lemon zest and season with salt and pepper to taste. Serve immediately! Leftovers keep well in the fridge or freezer.

Looking for other weeknight comfort food ideas?

Try these recipes from The Ardent Cook!

Favorite Roast Chicken

Curried Pumpkin Chickpeas with Cucumber Raita

Wild Mushroom Farro with Parmesan and Microgreens

Recipe Ingredients

1lb Rigatoni

1lb ground sweet Italian sausage

1tbsp olive oil

3 cloves garlic, minced or grated

1 tsp crushed red pepper flakes, more or less to taste

1 head kale, stems removed and roughly chopped

3/4 cup heavy cream, plus more if needed

1/2 cup pasta cooking liquid

1 cup mozzarella cheese

1 tbsp fresh lemon zest

Salt and freshly ground black pepper, to taste

Recipe Instructions

  1. Cook pasta according to package instructions Before draining, reserve 1/2 cup of the cooking liquid and set aside.
  2. While the pasta cooks, brown sausage in a large skillet or deep pot. Once browned, push sausage to the sides of the pan and make an open area in the center.
  3. Add olive oil, garlic, and crushed red pepper flakes to the center of the pan and cook 1-2 minutes until fragrant. Mix to incorporate with the sausage. Add the kale and stir again, allowing it to wilt.
  4. Add the pasta directly to the pan with the sausage and kale, turn the pan to low heat, then stir in the heavy cream, pasta cooking liquid, and mozzarella. Fold consistently until a creamy sauce forms. You may use additional cream to achieve your desired sauce consistency, if needed.
  5. Stir in the freshly grated lemon zest, salt, and pepper, and serve hot! Enjoy!

There may be affiliate links in this post! By purchasing a product I recommend, I may receive a small compensation. However, I only recommend products I love and use myself. Thank you for your continued support of The Ardent Cook, it does not go unnoticed.

Instant Pot Lemongrass Pork Bowls

Now that I finally bit the bullet and bought an Instant Pot (albeit I got it for half price on Facebook marketplace), I truly can’t believe I lived without one. It’s not that it can do anything magical that I can’t do in a pot on the stove, it’s just the fact that it goes so. much. faster. What would normally take over 2 hours takes like…. 15 minutes?!

I will admit I was extremely nervous to use this. Something about the pressure had me totally wigged out, like I’d open the lid and pork would shoot across my kitchen. Let me state this disclaimer: as long as you allow for 10 minutes of natural release (or longer, if you’re doing something else), you will be completely fine to let the remaining pressure release via the quick release function. If you don’t know what I’m talking about, continue reading this recipe, which will explain everything.

These Instant Pot Lemongrass Pork Bowls are loaded with bright flavor from the lemongrass and fresh veggies. They are customizable based on the vegetables you have on hand and it’s easy to swap out the brown rice base for whatever base you want. If I can give you one tip, it would be to absolutely make the easy pickled red onions. They totally make this dish in my opinion, and they only require a little bit of forethought and prep work to have homemade pickled red onions for days.

I hope you enjoy this recipe as much as I do, and I look forward to sharing more Instant Pot recipes with you all in the future!

Ingredients needed to make Instant Pot Lemongrass Pork Bowls

These bowls are made using lots of fresh ingredients, which is one of the reasons I love them. The recipe includes amounts for 4 servings, so this is great for a small family or to have prepped leftovers for later in the week. You can always halve the amounts listed in the recipe if you only want 2 servings! Here’s what you’ll need:

  • Brown rice
  • Pork tenderloin
  • Fresh garlic
  • Lemongrass paste
  • Shredded carrots
  • Cucumber
  • Pickled red onion
    • Red onion
    • Red wine vinegar
    • Sugar
    • Salt
  • Jalapeno
  • Cilantro
  • Sesame Chili Vinaigrette

Tools used to make Instant Pot Lemongrass Pork Bowls

As the title of the recipe suggests, you need an Instant Pot to make this recipe in the time specified. If you don’t mind spending a little extra time, you could also do the pork in the oven roasted low and slow to get it to the perfect shredded consistency. I’d highly recommend the IP version, however, to make this a quick weeknight meal. Other than the Instant Pot, you’ll need a large cutting board, sharp chef’s knife, small saucepan, mixing bowl, measuring cups and spoons, and a whisk.

How to make Instant Pot Lemongrass Pork Bowls

The majority of the work for these bowls happens behind the scenes in the Instant Pot, which is great. To start, you’ll want to make your pickled red onions so they have time to cure while the rest of the meal cooks. Bring the vinegar, salt, and sugar to a boil and stir until everything has dissolved. Pour over the sliced red onions in a glass jar or tupperware container, and set aside.

Next, sear the pork on all sides using the sauté feature on the IP. You may need to work in batches to avoid crowding, then you’ll transfer the seared pork back into the pot along with the garlic, lemongrass paste, water, and a little salt and pepper. Set it to manual high pressure, then set the timer for 32 minutes. Keep in mind the whole thing will take longer than 32 minutes, as the pot needs time to pressurize as well as time to naturally release after cooking. Total time in the pot is about 50-60 minutes.

If you don’t have an Instant Pot, you can easily make the pork in the oven. Simply follow the steps above to sear the pork, then roast in a Dutch oven (or similar oven-safe pot with a tight-fitting lid) at 350 for 1-2 hours, until the pork shreds very easily.

While the pork cooks, you’ll thinly slice all of the vegetables and cook the rice (if not cooked ahead of time). You can also make the dressing- simply combine all the ingredients and whisk until mixed. Once the pork is finished, shred it using two forks and toss it back in with the juices, then assemble. Layer the rice, shredded pork, sliced veggies, and fresh cilantro, if using, then drizzle all over with the sesame chili vinaigrette. Easy as that!

Looking for other easy weeknight bowls?

Try these other recipes from The Ardent Cook!

Curried Pumpkin Chickpeas with Cucumber Raita

Harvest Steak and Goat Cheese Bowls

Ponzu Greens and Grains Bowl

Recipe Ingredients

2 cups brown rice or quinoa, cooked

2 pork tenderloins, about 2-2.5lbs total

½ cup water 

4 cloves garlic, minced

¼ cup lemongrass paste

1 cup shredded carrots 

1 cup thinly sliced cucumber

½ cup pickled red onion

  • one medium red onion, thinly sliced
  • 1 cup red wine vinegar
  • 2 tbsp sugar
  • 1 tbsp salt

1 jalapeno, seeded and thinly sliced

½ cup cilantro, finely chopped, packed 

½ cup sesame chili vinaigrette

  • ¼ cup rice vinegar
  • 1 tsp honey
  • Juice of ½ lime
  • ¼ tsp ground ginger
  • ½ tsp sesame seeds
  • ¼ tsp toasted sesame oil
  • ¾ tsp chili garlic sauce (or sriracha)
  • ¼ tsp salt

Recipe Instructions

  1. Make the pickled red onions. Thinly slice onion and add to a large pickle jar or heat-safe container. Bring the vinegar, salt, and sugar to a boil, stirring until sugar has dissolved. Let cool for 3 minutes, then pour over the onions to cover. Set aside.
  2. Cut the two tenderloins into 2-3 equal pieces and season on all sides with salt. Turn instant pot to the normal sauté function and sear pork. You may need to work in batches. 
  3. Once seared, transfer the pork to a plate and add the lemongrass and smashed garlic. Stir for 30 seconds or so, until very fragrant, then add water to deglaze the pot. Add the pork back in and set to manual high pressure, then set the timer for 32 minutes. Allow for natural pressure release for 10 minutes, then quick release to completely depressurize the instant pot.
  4. Shred the pork using two forks, then return it to soak in its juices. Assemble the bowls by dividing the ingredients amongst four servings. I like to have a bowl each for dinner, then have two leftover for our lunches the next day. Layer the rice, shredded pork, sliced veggies, pickled red onions, and cilantro (if using). Drizzle all over with the sesame chili vinaigrette and enjoy!

There may be affiliate links in this post! By purchasing a product I recommend, I may receive a small compensation. However, I only recommend products I love and use myself. Thank you for your continued support of The Ardent Cook, it does not go unnoticed.

Stuffed Acorn Squash with Buttered Sage Breadcrumbs

Stuffed Acorn Squash with Buttered Sage Breadcrumbs is the perfect fall comfort dish. A filling of ground pork, celery, shallots, garlic, and apples is finished with delicious golden raisins and fresh sage and thyme. It all gets tossed with cubes of sharp Irish cheddar and stuffed inside tender roasted acorn squash. And the best part? These are topped with buttered sage breadcrumbs, which you can’t even imagine until you taste them. They are phenomenal. Caramelized squash, savory herbs, melty cheddar, crisp breadcrumbs…oh my.

Ingredients needed to make Stuffed Acorn Squash with Buttered Sage Breadcrumbs

These squash pack a lot of flavor, and therefore the ingredient list is semi-long. Don’t fret. It’s a super easy process and everything gets made in one skillet then baked on one sheet pan. Not as overwhelming as you thought, right? Here’s what you’ll need:

  • Acorn squash
  • Olive oil
  • Ground pork
  • Shallots
  • Celery
  • Apple
  • Fresh or dried sage
  • Fresh or dried thyme
  • Fresh garlic
  • Golden raisins
  • Sharp Irish cheddar
  • Salt and pepper
  • Sourdough or other crusty bread
  • Butter

Tools used to make Stuffed Acorn Squash with Buttered Sage Breadcrumbs

The filling for these squash comes together in one skillet, which makes for pretty easy clean-up. You’ll also need a sharp knife, large cutting board, a chopper or food processor (to make the breadcrumbs), and a sheet pan or baking dish. That’s a small list, right?!

How to make Stuffed Acorn Squash with Buttered Sage Breadcrumbs

Making these squash requires a few steps. First, we need to prep and chop our vegetables. You’ll want to wash and dry everything before use, then start by halving and cleaning the seeds out of the squash. Set those aside and finish chopping the shallots, celery, apples, and garlic. If you’re using fresh herbs, you can also take this time to mince those up.

The squash get roasted with olive oil, salt, and pepper, for about 35-40 minutes until fork tender. Moving on to the filling, begin by heating your skillet over medium heat. You’ll sauté the pork along with the shallots and celery until the pork is cooked, then add the apples, herbs, and garlic and cook for a few minutes more. Stir in the cheddar, stuff into the squash, and top with those delicious buttered sage breadcrumbs (which take about 2 minutes to make by the way). Lastly, you’ll pop them back in the oven to melt that cheese and get the breadcrumbs nice and golden. Perfection!

Looking for other flavorful autumn recipes?

Try these other comforting dishes from The Ardent Cook!

Potato, Leek, and Corn Chowder

Roasted Apricot Chicken

Harvest Steak and Goat Cheese Bowls

Recipe Ingredients

For the Stuffed Acorn Squash

2 large acorn squash

1 tbsp olive oil

1lb ground pork

2 medium shallots, diced

2 stalks celery, diced

1 medium apple, diced

½ tsp dried or 2 tsp fresh sage

¼ tsp dried or 1 tsp fresh thyme

2 cloves garlic, minced

½ cup golden raisins

½ cup sharp Irish cheddar, diced into small cubes 

Salt and pepper, top taste

For the Buttered Sage Breadcrumbs

2-3 large slices sourdough or other crusty bread

3-4 fresh sage leaves

2 tbsp butter

Salt and pepper, to taste

Recipe Instructions

  1. Preheat the oven to 400 degrees Fahrenheit. Cut squash in half lengthwise and scoop out the seeds and strings. Drizzle each half with olive oil, then sprinkle with salt and pepper. Bake, cut side down, for 45 minutes or until squash are fork tender. 
  2. In a large skillet, brown the pork, shallots, and celery, about 5-7 minutes. Season with salt and pepper. Add the apple, sage, thyme, and garlic and cook for an additional 3-4 minutes, until the apple is just soft. 
  3. Make the breadcrumbs. Pulse the bread in a food processor or high speed blender until a crumb forms. Melt butter in a skillet and add the sage leaves. Fry the sage leaves for 1-2 minutes until crispy, then add the breadcrumbs and stir to coat in the butter. Season with salt and pepper. Remove the sage leaves and set the breadcrumbs aside. 
  4. Remove the filling from the heat and fold in the golden raisins and cheddar cubes. Spoon the filling into each half of the squash and top with the breadcrumbs. Return to the oven for another 10 minutes, or until breadcrumbs are golden brown.
  5. Serve immediately, or wrap tightly in foil and store in an airtight container in the fridge for up to 3 days. When ready to eat, place the entire foil-wrapped squash half on a sheet tray and heat in the oven at 350 for 10-15 minutes. Enjoy!

There may be affiliate links in this post! By purchasing a product I recommend, I may receive a small compensation. However, I only recommend products I love and use myself. Thank you for your continued support of The Ardent Cook, it does not go unnoticed.

Broccoli Salad with Quick Homemade Ranch

The end of summer is drawing near and people are beginning to get in their last socially distant barbecues. I’ve been invited to a few and this Broccoli Salad with Quick Homemade Ranch is what I’ve been turning to as my food contribution. Studded with crisp bacon, minced shallots, and chewy raisins, this easy Broccoli Salad is only made better by the homemade Greek yogurt ranch dressing. It’s a healthy alternative to store-bought ranch and takes less than five minutes to make, plus I’d argue it tastes better than the original!

Ingredients needed to make Broccoli Salad with Quick Homemade Ranch

The ingredients for Broccoli Salad are probably self-explanatory. I’ll give you a hint- they involve broccoli. You’ll need a large head of broccoli, one or two shallots, 6 slices of bacon, and raisins. For the Quick Homemade Ranch, it’ll require plain Greek yogurt, a few tablespoons of water, fresh parsley, fresh chives, onion powder, garlic powder, salt, and pepper! It’s simple and flavorful in under five minutes!

Tools used to make Broccoli Salad with Quick Homemade Ranch

Since there is barely any real “cooking” required for this recipe, the tools you need are minimal. As always, a good chef’s knife is essential in the kitchen for everything from chopping the broccoli to mincing the fresh herbs. Here is my favorite. In addition, you’ll need a medium skillet to crisp your bacon, such as this one. I love it because it uses hard-anodized aluminum to create a nonstick surface, rather than traditional teflon that can leach chemicals into your food. It’s durable and cleans SO easily.

Other than a knife and skillet, you’ll need a few basics such as a large mixing bowl, cutting board, measuring tools, and a whisk. Hopefully you already have most of those items stocked in your kitchen and can get right to salad-making!

How to make Broccoli Salad with Quick Homemade Ranch

This recipe involves very little real cooking, so it’s perfect to do with kids or if you don’t want to put forth a lot of effort. You begin by crisping up 6 slices of bacon, which is truly the only time you need to turn on the stove. Chop the cooked bacon, along with the broccoli and shallots, and add to a bowl with the raisins. To make the dressing, simply combine all remaining ingredients and whisk. Drizzle it over your broccoli and enjoy! I love to chill this salad for a few hours before eating, so it’s great to make-ahead or use for meal prep. The longer it sits, the better it gets!

If you’re a ranch fiend like I am, feel free to double the recipe and save whatever you don’t use on your salad for dipping veggies, pizza crust, or drizzling over pretty much anything. It’s so yummy and stores for 4-5 days when kept in an airtight container!

Looking for other healthy side dishes?

Check out these other recipes for some more of my favorite healthy sides.

Cheesy Corn and Poblano Casserole

Charred Corn Salad with Cumin Lime Vinaigrette

Blistered Green Beans with Garlic and Ginger

Crunchy Sesame Coleslaw

Recipe Ingredients

1 large head broccoli, chopped into small pieces

6 slices bacon, cooked and chopped 

1 shallot, diced

¼ cup raisins

½ cup greek yogurt

3-4 tbsp water 

⅛ cup fresh parsley

⅛ cup fresh chives

½ tsp onion powder

½ tsp garlic powder

½ tsp salt

¼ tsp pepper

Recipe Instructions

  1. Crisp the bacon in a medium skillet until cooked through, then chop. 
  2. Chop broccoli into small pieces and add to a large mixing bowl, along with the cooked bacon, diced shallots, and raisins. 
  3. In a separate mixing bowl, combine the greek yogurt, herbs, spices, salt, and pepper. Add water, tablespoon by tablespoon, and whisk until you reach your desired consistency. 
  4. Pour dressing over the salad and fold to incorporate. Chill for 30 minutes or overnight, then serve cold. Enjoy!

There may be affiliate links in this post! By purchasing a product I recommend, I may receive a small compensation. However, I only recommend products I love and use myself. Thank you for your continued support of The Ardent Cook, it does not go unnoticed.

Jeff’s Special “Bacon and Crispy Brussels Sprout Mac and Cheese”

When Jeff came to me with this idea, he had literally no intention of creating a recipe for the blog and was purely concerned about dinner that night. We had a ton of Brussels sprouts to use, three slices of bacon in a forgotten pack, pasta, and a block of Monterey jack cheese, and you would’ve thought he had just found the answer to life’s biggest question when he pronounced that this was what he wanted to make for dinner. Fortunately, it turned out amazing, so I had to share.

You start by quartering the sprouts, dousing them in oil, salt, and pepper and roasting at 425. While those crisp up, cook your pasta according to package instructions and brown up some chopped bacon until crispy. The sauce comes together with some of the rendered bacon fat, a few spoonfuls of flour, milk, and the cheese, plus some seasonings as well.

This dish is simple, comforting, and can be catered towards many different diets depending on the variety of pasta and dairy products you choose to use. Of course, nothing will ever replace the pure indulgence that is bacon fat, real pasta, real cheese, and whole milk, but I’m confident this will be just as amazing if you use a gluten free pasta variety, dairy-free milk, or vegan cheese. I can’t say anything about leaving out the bacon though, that’s a personal matter.

I hope you guys give Jeff’s Spesh a try and post all the photos so he can see how many people love his culinary endeavors- I know I do! If you do make this, don’t forget to tag me @theardentcook on Instagram!

Ingredients

1lb short pasta, such as macaroni, casarecce, or penne

3 slices thick-cut bacon (or more if you have it, Jeff says), diced

1/2 pound fresh Brussels sprouts, cleaned and quartered

2 TBSP reserved bacon fat, or butter

2 TBSP flour

1 cup whole milk

1 cup Monterey jack (or similar) cheese, grated

Olive oil, for greasing

Salt and pepper, to taste

Instructions

  1. Preheat oven to 425 and bring a pot of water to a boil.
  2. Clean and halve or quarter Brussels sprouts, depending on their size, and place on a sheet pan with olive oil, salt, and pepper. Roast until charred and crispy, about 20 minutes.
  3. Cook the pasta according to package instructions.
  4. Meanwhile, in a medium skillet or saucepan over medium heat, brown bacon until just crispy.
  5. Transfer bacon to a plate lined with a paper towel and remove all but 2 TBSP of bacon fat from the pan.
  6. Whisk in 2 TBSP of flour, stirring constantly until a thick roux forms. Allow the roux to brown for about 2 minutes, being careful not to burn it.
  7. Stir in milk and whisk until the roux dissolves. Add cheese and stir again until it has melted and the sauce is cohesive. Taste for salt and pepper and add accordingly.
  8. Pour cheese sauce over cooked pasta and add in half of the cooked bacon. Fold to combine.
  9. Top pasta with the crispy Brussels sprouts, additional bacon, and fresh cracked black pepper. Enjoy!